Friday, November 11, 2022

Veterans Day


First, a loud shout-out to all my veteran comrades on this Veterans/Remembrance Day.

I participated in a small Veterans Day parade put on my the local citizens/business organization, Fondren Renaissance, around the neighborhood in which my church is located .

With my driver, Lloyd

It was an interesting experience since besides military reviews the last time I marched in an actual parade with a military unit was during Mardi Gras in 1972 and 1973!


Thursday, October 13, 2022

First Pashtun Unit for TMWWBK


After many weeks I finally finished my first unit of Pashtun infantry to be used with "The Men Who Would be Kings" rules.

These twelve mountain warriors are all armed with rifles - a mix of a few modern bolt-action rifles, a number of Martini-Henry single-shot rifles, and a couple of rifled jezzails.  They are all Old Glory castings.


Under the unit categories, they are "Irregular Infantry" with a 6" movement rate and worth 4 points.  In the rules, this category "is a catch-all for troops neither impeccably trained and drilled European regulars nor  native troops fighting in Tribal fashion."

You'll notice that two of the warriors will be carrying around their own rocks for cover.  These particular Old Glory castings are inherently unbalanced and would fall over if not supported.  I got the idea of using rocks from Neil of the Toy Soldiers and Dining Room Battles blog, in particular this post of his.  Thanks, Neil!

This is the first of seven Pashtun units in my lead pile - two more irregular rifle armed units, three tribal infantry melee weapons units, and a tribal cavalry unit.  Hopefully with some perseverance I can get all of these painted by the end of the year.

Wednesday, October 12, 2022

Medieval Crossbows


After a couple of games last month using the "Lion Rampant, 2nd Edition" rules, I saw a need to complete a unit of crossbows.  I had four painted 25mm figures obtained a number of years ago and decided to match them with eight unpainted figures that I had acquired a fewer number of years ago.  I knew I couldn't even begin to match the paint job of the original figures.

So here we have my new unit of twelve crossbows:

Please click on image for a larger picture.

I think you can probably tell which ones are newly painted (hint, their helmets are all the same) and which ones I bought already painted.

My Medieval troops are all (or will soon be) mounted on hexagonal bases to distinguish them from the forces raised by my wargaming buddy Lord Sterling which are either on round bases or rectangular/square bases.


Sunday, September 11, 2022

Mustering the Troops


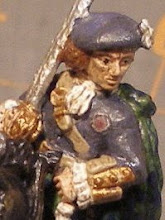
It has been over a month since I've posted anything, which is not really unusual.  Various non-gaming related events have "interfered" with my gaming activities.  But I have been working on several gaming items.  One being obtaining a copy of the 2nd edition of Dan Mersey's "Lion Rampant" medieval rules.  After reading through the rules and digesting the changes, I said, "Self, we need to have a medieval game."  So I dug out my vintage 25mm Medieval troops and started planning.

After updating my "retinue" list (now a "warband" list) from our last games back in 2015, I planned on what I needed to do to bring some of the units up to date.  Many of my units have gone from washers (infantry) and rectangular metal bases (cavalry) to hexagonal bases, but not all.  I did that to differentiate my Medieval units from those of Lord Sterling who has the Kingdom of Parallelogram and the Kingdom of Circumference.  I decided in the Duchy of Hexagonal, although I called it the Duchy of Bentwood.

Please click on a picture for a larger image.

So here are the first eight Warbands (each of 24 points), first the forces loyal to Duke William Worthington:

From the left - Bentwood Castle, Castle Kilgarren, Cove Hold, and Southern Hold.  Since I took this picture I've substituted some units for others, but the basic composition remains the same.

Bentwood Castle (Duke William) -- two elite cavalry (AKA knight) units, two heavy infantry units, and one Archer unit.

Castle Kilgarren (Sir Robert Hastings, Constable) -- one elite cavalry unit, one heavy cavalry unit, two veteran heavy infantry units, and one skirmisher unit.

Cove Hold (Count Leslie Dumfries) -- one elite cavalry unit, two heavy cavalry units, one veteran heavy infantry unit, and one crossbow unit.

Southern Hold (Baron Hugh Guisby) -- one elite cavalry unit, two heavy cavalry units, one veteran heavy infantry unit, and one archer unit

Against them are arrayed the rebellious alliance:

From the left - the Teutobergerwald Abbey, Free City of Haven and Men of the Dale, High Tor Keep, and High Reaches Castle.  Again a couple of units have been substituted since the pictures was taken.

Teutobergerwald Abbey (Lord Abbot Heinrich von Kurland) -- two elite cavalry units, two heavy infantry units, and one crossbow unit.

Free City of Haven (Walter, Hereditary Manager of the Free City) and Men of the Dale -- one heavy cavalry unit, one veteran heavy infantry unit, two light infantry units, and one veteran archer unit (the Men of the Dale).

High Tor Keep (Baron Stephen de Bleu) -- two elite infantry units, two light infantry units, and one archer unit.

High Reaches Castle (Freiherr Uwe von Strenger) -- one elite cavalry unit, one heavy cavalry units, two heavy infantry units, and one veteran archer unit.

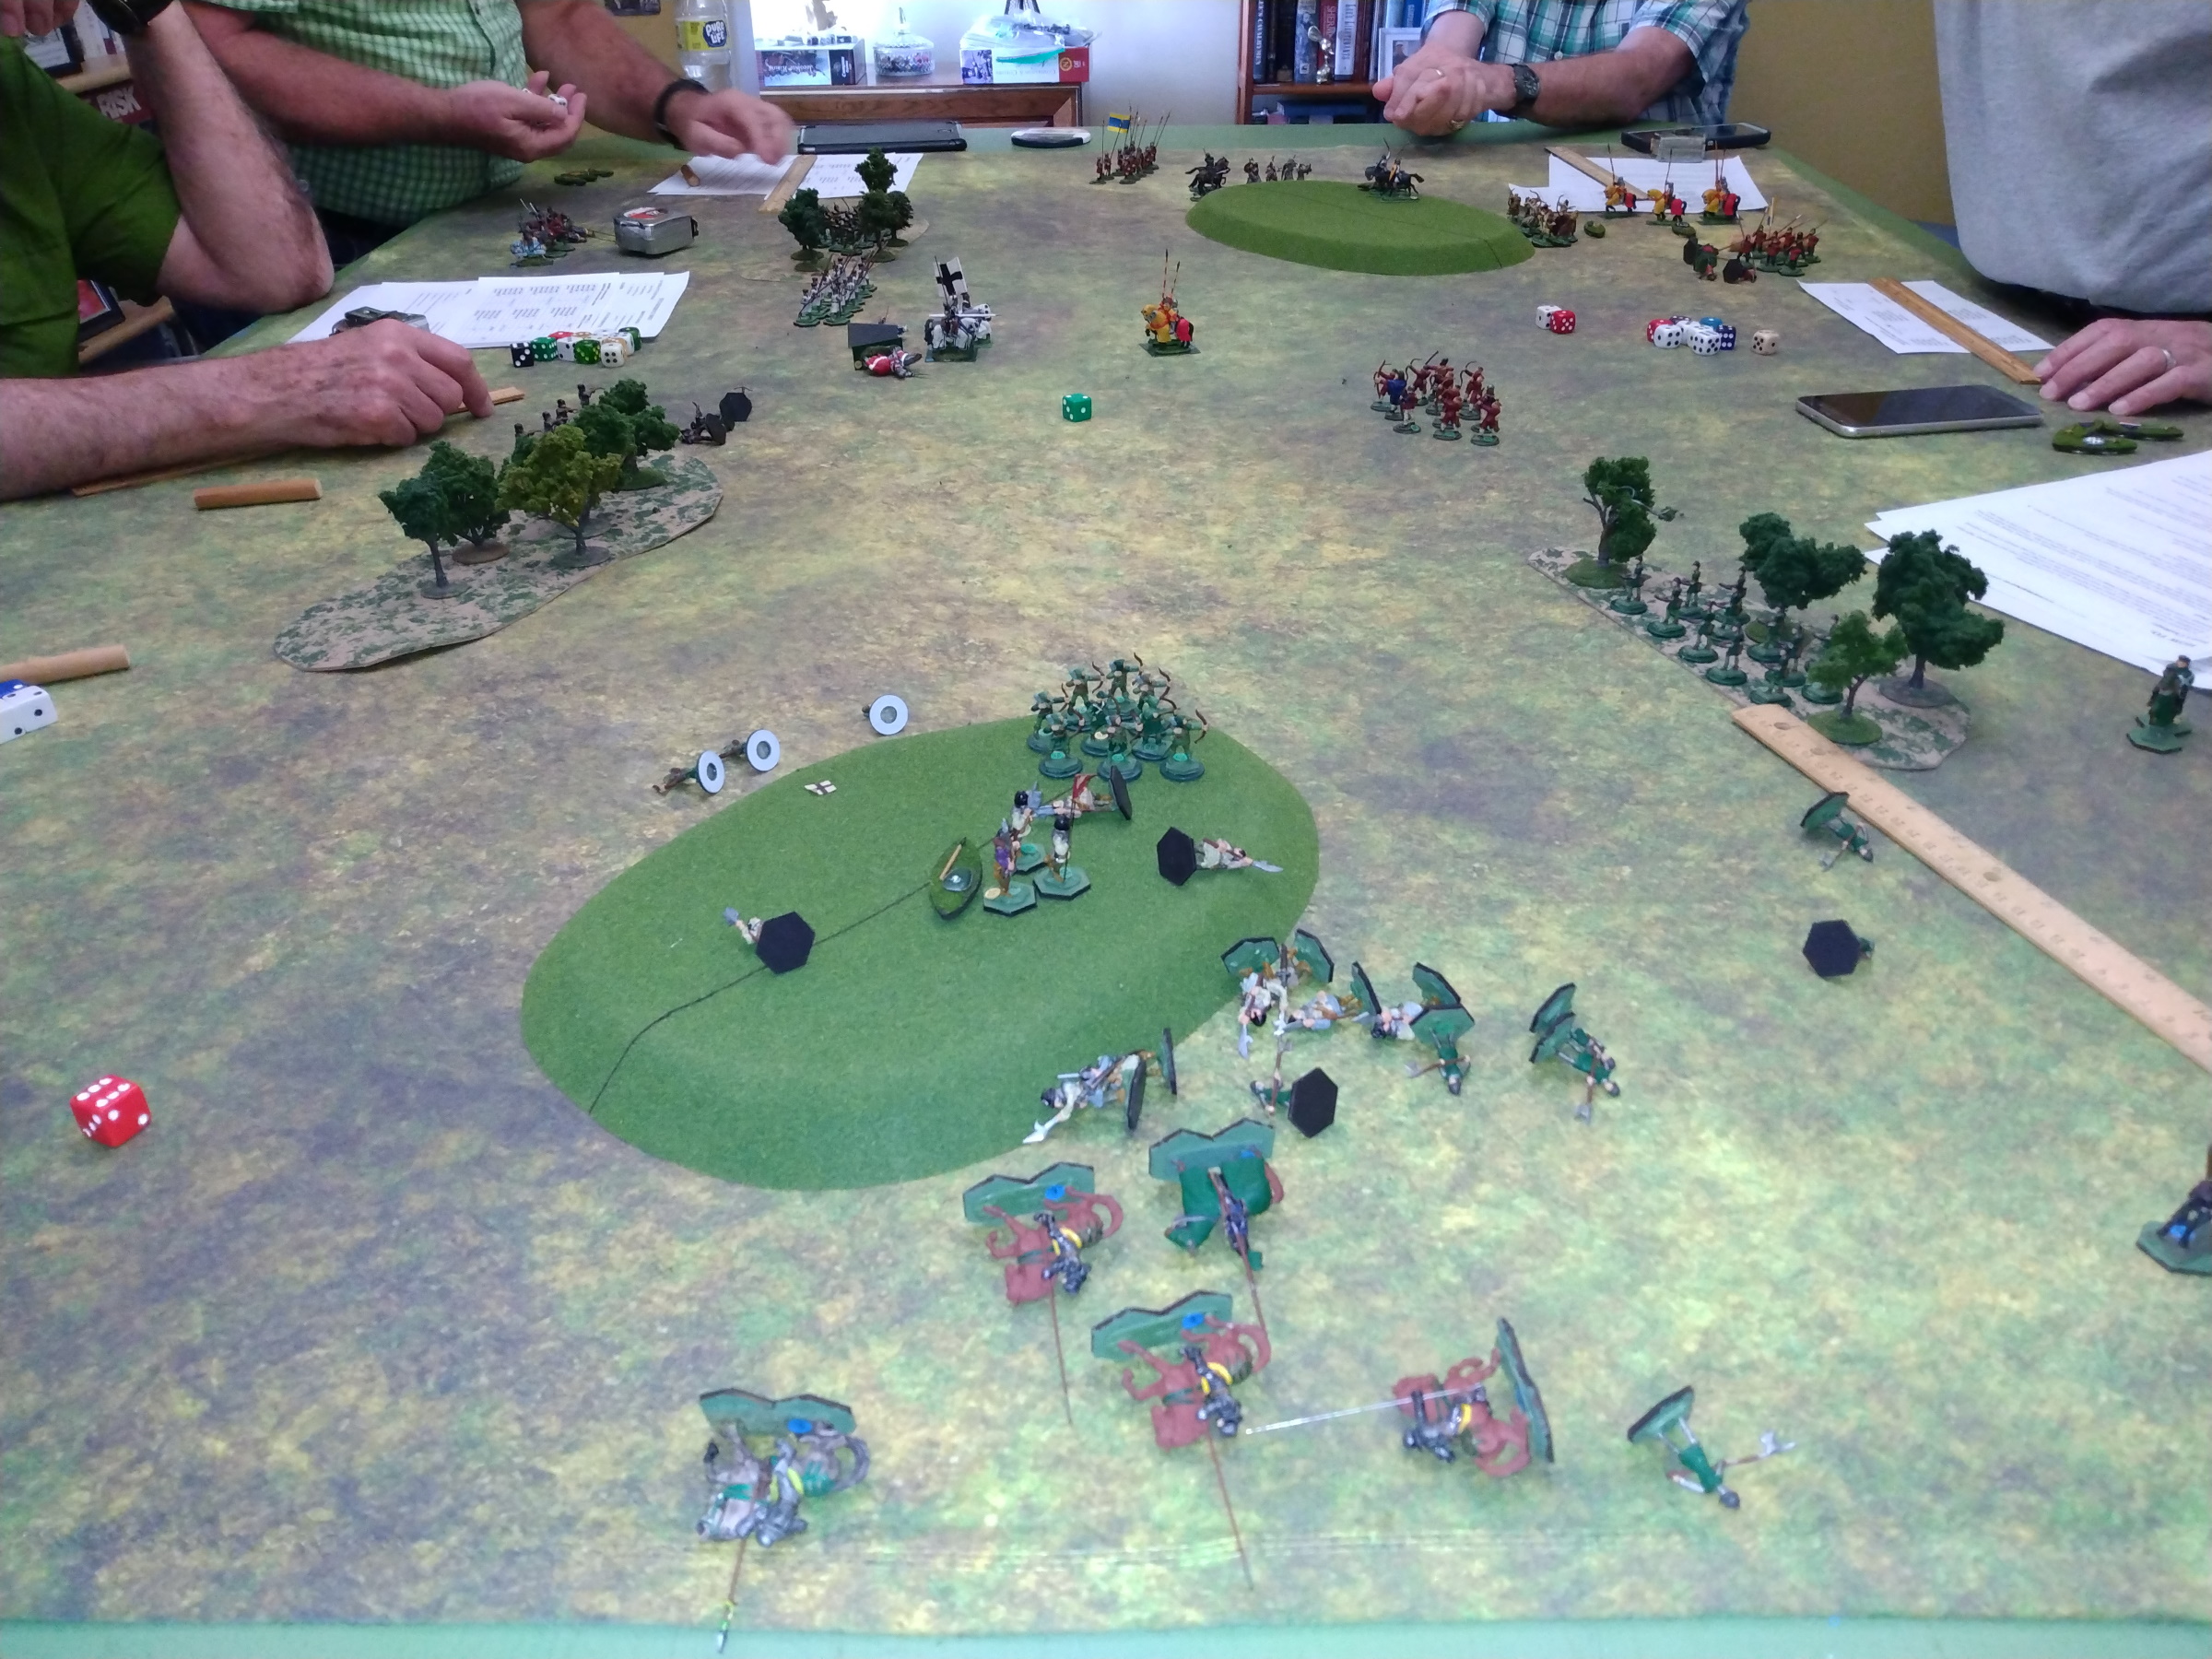
With these warbands, I designed a small game for our Thursday "Old Guys" Group.  It pitted three loyal warbands against three rebel warbands using the "Bloodbath" scenario from the rule book.  Each warband was 'balanced' with one heavy cavalry unit, one heavy infantry unit, and one missile unit.  It was an interesting game with all the players either getting introduced or re-introduced to the rules.


The Warband from the Free City of Haven was successful in repulsing the Warband of Cove Hold from taking a rolling hill on one end of the battlefield.  The Cove Hold heavy cavalry and heavy infantry were singularly unsuccessful in driving the Havenites from the hill and suffered tremendous casualties.

An overview of the entire battlefield towards the end of the action.  There was much bloodshed, several leaders were killed in challenge duels, and the rebels persevered over the loyalists.

I have a larger game scheduled for my wargaming group on Saturday.


Tuesday, August 9, 2022

Rajah of Kashgar


While painting on a unit of Pushtun infantry, I decided to use an extra Old Glory figure to make the ruler of my little imaginary princedom, Kashgar in the vale of Khalaam.  And so I present, the Rajah of Kashgar.

The Rajah (center) flanked by his wife, the Rani, and his Sikh councilor, Lal Singh.

The Rajah is from the Old Glory CNP-01, Pathan Command pack while the Rani and Lal Singh are Pulp Figures and were featured on previous blog postings.

Now back to the Pushtuns.


Sunday, August 7, 2022

International Naval Wargames Day - Yellow Sea, 1905


Our group gathered at a friend's house on Saturday, 6 August, for a naval wargame.  We used my 1:2400 scale Russian and Japanese Panzerschiffe ships on a Cigar Box battle mat with David Manley's "White Bear, Red Sun" rules.

The action was a "what if" scenario between the Russian Pacific Fleet based in Port Arthur and the Japanese Combined Fleet.

The orders of battle were:

Russian Pacific Fleet:
     1st Battle Division -- Petropavlovsk (B) [fleet flag], Poltava (B), Sebastopol (B), Tsesarevich (B)
     2nd Battle Division -- Peresvyet (B) [flag], Pobyeda (B), Oslyabya (B), Petvizan (B)
     Long-Distance Scout Division -- Bayan (AC) [flag], Diana (PC), Pallada (PC), Aurora (PC)

Japanese Combined Fleet:
     1st Division, Sub-Group A -- Mikasa (B) [fleet flag], Asahi (B), Fuji (B), Yashima (B)
     1st Division, Sub-Group B -- Shikishima (B) [flag], Hatsuse (B), Niishin (AC), Kasuga (AC)
     2nd Division -- Izumo (AC) [flag], Azuma (AC), Asama (AC), Yakumo (AC), Tokiwa (AC), Iwate (AC)

The rules have four levels of damage:  
     Damaged (black puff) -1 to firing for rest of game; cannot be repaired
     Silenced (orange or yellow puff) no firing and -1 when fired upon; can be repaired back to 'Damaged'
     Crippled (red puff), no firing or moving and -2 when fired upon; can be repaired back to 'Silenced'
     Sunk 

All six commands started out in line ahead formation and sailed toward the enemy.  We join the action in progress (I forgot to start taking pictures until several turns into game.).  "North" is to the top of all the pictures.  Please click on a picture for a  larger image.

Russian ships on the left and Japanese ships on right.  Top - Russian 1st Battle Division versus Japanese 2nd Division (armored cruisers); center - Russian 2nd Battle Division versus Japanese Division 1-A; bottom - Russian Long-Range Scouting Division versus Japanese Division 1-B.

Japanese 1-B and 1-A Divisions begin to engage the Russian Long-Range Scouting (LRS) Division and the 2nd Battle Division.

With the Bayan silenced (orange puff), the rest of the cruisers try to shield him from the Japanese 1-B Division.  In the background, the two battleship divisions engage each other closely with the Mikasa also being silenced.  The dice indicate Action Points allocated to repair damage to ships.

At the northern end of the action, the Japanese 2nd Division navigates around the rear of the Russian 1st Battle Division.  The two lead Japanese cruisers are damaged, but the Russian battleships are proving tough nuts to crack.

Back down south, the Russian cruisers run from the Japanese battleships and armored cruisers of Division 1-B.  Their "pop guns" are of little use against the armor of the larger Japanese ships.  At the top, the Japanese Division 1-A turns away to help their smaller armored cruiser cousins, leaving one battleship crippled and dead in the water (red puff).  She was later repaired and rejoined the fray.

Seeing the Japanese disengage, the Russian 2nd Division turns its guns onto the Japanese Division 1-B.  Both sides begin to score hits (black puffs).  The Russian cruisers try to cross the Japanese T to see if they can do better with their pop guns; they couoldn't.

Back up north the trail Japanese armored cruiser Yakumo is hit many times and begins to sink.

As the Japanese cruisers on Division 2 draw away, the Russian 1st Division battleships unexpectedly cross the T of the Japanese Division 1-A battleships, inflicting more damage to the lead Japanese battleship (orange puff) and the two trail ones (black puffs).  But they have a battleship that has fallen out of the line (orange puff)

Under fire from the Japanese battleships and armored cruisers, the Russian protected cruiser Aurora is crippled (red puff).  His comrades dodge around him while the Russian 2nd Battle Division doesn't have much success against the Japanese ships.

Continuing to blast the Russians, the Japanese are successful in sinking the poor Aurora.  Well, looks like some other ship will have to start the revolution.  The Russian battleships have turned away.  Their admiral must have had second thoughts about engaging the Japanese.

To the north, the flaming wreck of the Japanese armored cruiser Yakumo still lights up the scene as her fellow cruisers turn toward the Russian battleships whose T has been crossed by the Japanese Division 1-A battleships.  The trailing Russian battleship is crippled (red puff) and suffers a critical hit setting him on fire!  But two of the Japanese battleships are silenced (orange puffs) and can't contribute to punishing the Russians.

The Russian battleship's fires were extinguished but his damage was so heavy that he is still crippled (red puff).  His fellows pull away to regroup, leaving the Japanese battleships and cruisers to sail by each other as cheers erupt from both divisions.

Back down south the Russian cruisers frantically try to escape from the guns of the Japanese Division 1-B battleships and armored cruisers.  The Russian 2nd Battle Division tries to decide whether to pass ahead of or down the starboard side of the cruisers.

Back up north, pummeled by Japanese battleships and armored cruisers, the Russian battleship Tseserevich explodes from a critical hit on his magazines.

Finally the Russian battleships get the range and pummel the Japanese armored cruiser Niishin, sending her to the bottom.

This ended the battle as darkness began to fall allowing the Russian ships to escape back to Port Arthur.  The Japanese sank a Russian battleship and a protected cruiser while loosing two armored cruisers of their own. 

Everyone had a good time and my pre-dreadnoughts saw action for the first time in over four years.

Wednesday, August 3, 2022

And Thugees Join the Cast!


After painting Russians, British, and Indians, it was time to get working on some enemies for them.  Enter a 16-figure unit of Indian thugees (or ill-costumed very irregular tribal warriors).  All but one are Bob Murch's Pulp Figures from packs PBT-22, 23 and 27.  The better costumed leader is a figure that I've had for many a year.  Until I needed a leader figure for these guys, he was a my pirate box.  But with such a nice turban, sword, and musket, I knew he really belonged in the 19th Century Northwest Frontier fighting against the forces of the Raj.


These figures can be used in a number of roles, both fighting for and against the Raj or defending their village against marauders.

Now on to more "enemies" of the Raj - Pathans!

Saturday, July 30, 2022

Indian Army Corps of Guides - Unit #2


Regaining my stamina after a mild bout with Covid, I finished painting and basing my second company of Indian Army Corps of Guides.  Lead by their stolid havildar, these stalwart soldiers will bring glory to the Raj.  See the post on the 1st Company for details about the Guides service.


While preparing these figures for painting I noticed that one of them was missing part of his base, the part beneath his left foot.  Contemplating trouble with stability and the possibility of a broken ankle, I found a small rock in my "bag of rocks" that could be used to provide the figure with a stable footing.

On your left is a figure with a completely cast base and on your right is the incomplete figure with its added rock for stability.  If you'll look carefully in the first picture, this 'rocky' fellow is on the far left in the front row.

Now on to a unit of "Thuggees" who will be some opponents to the forces of the Raj.

Saturday, July 16, 2022

Bits and Bobs


After a number of years of on and off (but mainly off) painting, I've finally finished a batch of various terrain pieces for my 25mm forces.  Many of these can be used in various genres while a couple are only common to the Victorian/Edwardian colonial era.  So here they are ---

These three "barricade" pieces are made up of barrels, a chest, and various bags.  They can be used from the Pirate era all the way to at least the early 20th Century.  I mounted each of them on wood strips to increase the height for compatibility with 28mm figures.

The bee hives of "Tanga" of course probably didn't look anything like these wooden spindle ends, but I think they turned out rather well.  Just make sure you are well away from them if they get disturbed!

Two piles of trade goods and some barrels of spiritous liquid.

Big bins of food stuff and bales of cotton, both good for cover from enemy fire.

Two large silage bins made of stone, useful from Medieval times to the early 20th Century (and even beyond in some places).

So these now join my other bits and bobs of terrain pieces that will enhance an otherwise drab battlefield.

The figures are some of my just recently painted Indian Army Corps of Guides (see previous post).


Indian Army Corps of Guides - Unit #1


The Indian Army Corps of Guides was raised in 1846 to serve on the Northwest Frontier.  It quickly developed as one of the elite units of the Indian Army.  It was composed of both Hindu and Moslem troops.  In 1947, upon the partition of India and Pakistan, the Corps was assigned to the Pakistani Army and still exists as the 2nd Battalion (The Guides) of the Frontier Force Regiment.

This unit is composed of Foundry figures from NW014 and NW021.  Unfortunately Foundry had them all sculpted with full beards so this unit (and its #2, still being painted) will be all Hindu.

The 1st Company, led by Leftenant Manly-Jones (center with pistol) and seconded by Havildar Ranjit Singh (right rear with rifle at the carry).

I think this is one of the most distinctive group of figures that I've painted.  The contrasts of browns and tans set off by the red "cap" and cuff markings make the entire uniform stand out.


Wednesday, July 6, 2022

Indian Sikhs and French Foreign Legion


The equipping of new units proceeds apace at Col Campbell's Barracks.  I've added two new units to my Colonial forces.

First is a twelve-figure unit of Brigade Games Great War in Africa Sikh Indian infantry.  These guys are equipped as standard Indian infantry in the all khaki uniform from head to almost foot.

Led by a bugling havildar, these fighting Sikhs will give the enemy a case of .303 headaches!

And switching some thousand miles to the west, this unit of Pulp Figures French Foreign Legion will gain glory for La Belle France.

Led by Commandante Le Duc, these "Enfants Terrible" will show "Johnny Arab" a thing or two, if they are as good as they think they are.

But they do have some sappers to aid them ...

With dynamite, black powder and a big axe, these two legionnaires can do some damage.

Next in the painting queue are a few Arabs and a batch of Indian Army Frontier Guides.


Thursday, June 30, 2022

Identifying a French Officer


At our local convention earlier this month I purchased this mounted French-looking officer from an estate sale.  At first I thought it was a Hinchliffe figure, but I don't think Hinchliffe ever made mid-1800s ranges.  Can anyone help with a manufacturer and range?

And the answer is -- An Old Glory mounted French Foreign Legion officer!  Thanks!!

The figure is wearing a thigh length coat, slightly "bloused" trousers, and a kepi.  It is a two-piece casting - separate rider and horse.  There was no manufacturer identification readily readable on the horse and the two came glued together when I bought them.


Viewed from the left side, the rider is not equipped with a sword.  I'm planning on using the figure on my Franco-Prussian War French corps command group stand to replace another mounted figure.

Many thanks!


Tuesday, June 28, 2022

Drawing Room Detectives


And the last of my special figures have been completed -- the Drawing Room Detectives [set PMH-01] from Pulp Figures.  Besides the four famous detectives, the set included three "clues" (or plot points).

The four detectives and the three "clues" (or plot points)

I think I've identified three of the four detectives -- (from the right) Charlie Chan, Miss Marple, and Hercule Poirot.  But I'm not sure who the one of the far left is.  Any help is appreciated.

The three "clues" (plot points) are a stack of ancient tomes with a skull on top, a painted bust of Napoleon I, and the Maltese falcon ("... the stuff that dreams are made of ... .").

Now I'm back to painting "run of the mill" Colonial troops -- Indian army, Russian colonial troops, Thugees, and Pashtuns.

Monday, June 27, 2022

Kashgar and Trans-Siberian Renegades and Disheveled Detectives


The pulp ladies have been joined by two groups of renegades and a couple of disheveled detectives as I continue my June painting blitz.  Please click on pictures for a larger image.

First up are the "Renegades of Kashgar" from Bob Murch's Pulp Figures [set PHP-27].  

Surrounded by battling Warlords and cut off from escape, our party takes to the mountains in a desperate journey where only the brave can survive!

From left - Bren gunner, sniper, team leader and his wife, and second in command.

Pursuing them are "Count Casamir's" Trans-Siberian Renegades, also by Bob Murch [set PHP-17]

From left - Misha, the faithful bodyguard; daughter Yolanda, a fine fencer; Count Casamir and his wife the Countess (with her trained 'attack' falcon); and Blotsky, his chief of the Secret Police.

And a couple of disheveled and probably disreputable British detectives (from Northstar's Giants in Miniature line.  These two figures are out of production now.

The Disheveled Detective and his sidekick Dr. Hamish

They will soon be joined by Bob Murch's "Drawing Room Detectives" as the final group of special figures upon which I am working.  Then its back to the Indian Army, Russian colonial troops, some Thugees, and a large batch Pashtun tribesmen.


Sunday, June 19, 2022

More "Dangerous Dames"


In June, I've been continuing my painting of Bob Murch's Pulp Figures females.  Three other groups of "Dangerous Dames" have joined the collection.  Their names, when given, are my own creation as Bob hasn't named these ladies.  Please click on each image for a larger picture.

The Rugged Adventuresses [set PHP-20]

"Rugged gals on heroic quests for action and fortune!"
From left, a "two-pistol" packing gal, another pilot, "Big Mama" with her Lewis gun, a whip-wielding Oriental lass, and a Germanic gal.

Daughters of the Empire [set PHP-22]

"The sun never sets on these fierce ladies of adventure!"
From left, Miss Leslie Campbell, Shotgun Mama, the Rani of Kashgar, Miss Primrose, and sure-shot Jamie. 

Lady Rathbone's Raiders [set PHP-26]

"An A-Team of specialist adventuresses, roaming the world in quest of wrongs to right!"
From left, lady with a machete, katana lady, Lady Siobhan Campbell of Rathbone, machinepistol-packing mama, and a rifle armed lady.

Future painting will see them joined by the "Renegades of Kashgar" and "Count Casamir's Trans-Siberian Renegades" from Pulp Figures as well as the "Disheveled Detective" and "Dr. Hamish" from Northstar's Giants in Miniature.


Tuesday, June 7, 2022

Dangerous Dames


My last figures painted in May were five "Dangerous Dames" from Bob Murch's Pulp Figures "Heroes and Personalities" range.  This figure set is currently being resculpted so you won't see them on Bob's site right now.  Please click on image for a larger picture.

From left, they are co-pilot Molly O'Malley, pilot Jenny Curtis, Jin Long - the Dragon Lady, markswoman Lady Jane Grey, and Mrs. Hobbs

I plan on using these figures, and others in the painting queue, for Bob's "Rugged Adventures" rules.

Stay tuned for more!


Monday, May 30, 2022

Breckinridge's Division


This post shows all of Confederate Major General J. C. Breckinridge's Division of Hardee's Corps.  It was painted by my friend Larry on commission.  He did a great job.

As I've written before, my Confederate forces are loosely organized for Hardee's Corps, Army of Tennessee, during the mid-summer Tullahoma Campaign.

Except for the Battle Honors mounted officers, all the figures and guns are from Old Glory 15s.

Please click on the images for a larger picture.

Division command stand and divisional artillery

Breckinridge and his division flag bearer are on the left and the representation of the division artillery is on the right.

John Cabell Breckinridge was a son of Kentucky and Vice president of the United States under James Buchanan (1857-1861).  He unsuccessfully ran for president as a "Southern Democrat" in the 1860 election that saw Republican Abraham Lincoln elected president.  As one of Kentucky's senators he urged compromise to preserve the union but ultimately failed and fled to the southern controlled portion of Kentucky.  There he was commissioned as a brigadier general in the Confederate Army and then promoted to major general.  During the 1863 Tullahoma campaign his division served under General Joe Johnston in Mississippi against Major General U.S. Grant's offensive.  Recalled to Tennessee, Breckinridge's division participated in the battles at Chickamauga and Chattanooga.  For my purposes, this division did not go to Mississippi but stayed in Tennessee.

Breckinridge's division artillery consisted of three batteries.  Cobb's Battery, or the 1st Kentucky Artillery, started its service with four M1841 6-pound smoothbore guns and two M1841 12-pound mountain howitzers.  By July 1863 it had four M-1857 12-pound Napoleon guns.  Mebane's Tennessee Battery had four 12-pound howitzers.  Slocomb's Louisiana Battery had four 12-pound Napoleon guns and two James rifled guns.  For the purposes of the "On to Richmond!" rules all of these batteries are represented by one smoothbore gun.

Helm's Brigade

Helm's "1st Kentucky" or "Orphan" Brigade

The 1st Kentucky Brigade was originally commanded by Breckinridge.  Brigadier Benjamin Hardin Helm took over command in January 1863 and led the brigade until his death at Chickamauga.  The brigade was called the "Orphan" brigade after its recruiting ground in Kentucky was lost to the Union.  It served with the Army of Tennessee until the end of the war.  For the Tullahoma campaign it consisted of the 41st Alabama and the 2nd, 4th, 6th, and 9th Kentucky Regiments.  With a strength of about 1500 men, it is represented by five stands of figures.

Adams' Brigade

Adams' Brigade

Commanded by Brigadier General John Adams, this brigade consisted of the 32nd Alabama, and the  13th/20th Louisiana, 16th/25th Louisiana, and 19th Louisiana Infantry Regiments, and the  14th Louisiana Sharpshooter Battalion.  With a strength of about 1200 men, it is represented by four stands of figures.

Stovall's Brigade

Stovall's Brigade

Commanded by Brigadier General Marcellus Stovall, this brigade is the smallest of the three in Breckinridge's Division.  For this campaign it consisted of the 1st/3rd Florida, 4th Florida, 47th Georgia, and 60th North Carolina Infantry Regiments.  With a strength of about 900 men, it is represented by 3 stands of figures.

This division completes my Confederate troops for the time being.  Now off they go to battle!


Saturday, May 14, 2022

Bowen's Command Group and Division Artillery


Major General John S. Bowen commanded a two-brigade division in the Department of Mississippi.  While his division was part of Pemberton's "Army of Mississippi," in my "imagi-nation" Civil War it and Forney's Division were transferred to central Tennessee prior to Grant beginning his campaign to take Vicksburg.  His First Brigade was featured in a previous post.  The second brigade (Green's) is being painted.

Bowen's command stand on left and division artillery on right

John S. Bowen began his Civil War career as a commander of Confederate Missouri infantry.  He was promoted to Brigadier General in March 1862 and led his brigade at Shiloh and Corinth before it was assigned to the Vicksburg garrison.  His efforts at Grand Gulf and Raymond led to him being promoted to major general and put in command of a division which he led at Champion Hill and then into Vicksburg.  He died of dysentery after the surrender.  Of course in "my world" his division was transferred to Tennessee and joined Hardee's Corps in the Army of Tennessee after Stone's River.

Bowen's command stand - a Battle Honors mounted general and an Old Glory 15s flag bearer

Bowen's division artillery consisted of three batteries - the Appeal (Arkansas) Battery (two 3" rifles and two 12-lb howitzers) and Guibor's (four 6-lb guns) and Landis' (two 12-lb Napoleons and two 24-lb howitzers) Missouri Batteries.  It is represented as having all smoothbore guns.  In the "On to Richmond!" rules, Confederate gun stands consist of 12 guns.

Old Glory 15s gunners and gun

The rest of the division, Green's Brigade is being painted and will be posted later.  The entire division, as well as all my Union and Confederate troops, will receive their "baptism of fire" in a game next Saturday.