My gaming buddy, Jay Stribling, and I went down to Columbia, Miss. yesterday to visit our gaming friend Mark Stevens at his new house, complete with his own dedicated game room. It was nice, with a 12' x 6' table and plenty of room to maneuver around it.
Mark had a Sikh Wars game set up so we could play test the
Black Powder rules. An army of British and Honourable East India Company troops (6 or 7 infantry and 2 cavalry brigades) assaulted a ridge line of three redoubts held by the Sikh Army, which had about 5 or 6 infantry and 2 cavalry brigades. Mark and I commanded the Anglo-Indians and Jay commanded the Sikhs.
As usual, click on the pictures for a larger version.
The Anglo-Indian right flank, commanded by Mark Stevens.
The Anglo-Indian left flank commanded by yours truely, Col Campbell.
Although Mark had a copy of the rules and had read through them several times, none of us were familiar with them so we blundered through the first several turns. By the third turn, we were becoming comfortable with them but we were sure that we missed things - such as being able to roll saving throws for melee casualties as well as fire casualties. Anyway, on with the story.
While the Anglo-Indians slogged towards the ridge (although some brigades moved rather fast), Jay's left wing Sikh cavalry attacked one of Mark's guns.
And here is where we encountered a portion of the rules with which we were not comfortable. The artillery units, according to the rules are very fragile. At first (before we read more) we were loosing artillery units on both sides at an alarming rate. Then we realized that the gunners could ignore the first morale failure. But that still meant that the second failure saw the gunners fleeing for their lives. Later, Jay discovered that the morale table for gunners might have an error in it which would have benefited the gunners tremendously. Further reading of the rules will also probably change our opinion of this characteristic.
Here is my left flank infantry brigade and supporting artillery advancing steadily. The allied cavalry is moving up behind them to counter the Sikh right flank cavalry. The next turn the Sikh cavalry would move towards the center and my cavalry would follow them.
The armies were Mark's magnificently painted troops of MiniFig, Foundry, and others. On the battlefield (and in separate units) the differences of the figures disappeared. By the way, the British gun and crew in the above picture are actually Perry Carlist Wars figures of the British Auxiliary Legion (BAL). They were "drafted" for this game. Mark also "drafted" 1870s/1880s British limbers and crews (in khaki) for the game.
As my center brigades ascend the slope, Jay moves his Sikh troops forward and we begin to exchange fire. The center Sikh redoubt is in the background.
On the other side of that center redoubt, another of my brigades encounters Sikh infantry. But this time they are backed up by a Sikh cavalry brigade, who .....
... in a swirl of dust come galloping around the flank of the infantry and try to overpower the supporting artillery. Although I didn't get a picture of it, part of my allied cavalry brigade came to the rescue and forced the Sikhs to retire.
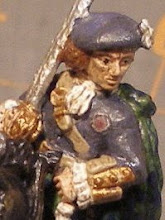
Meanwhile, two Indian infantry battalions assault the center redoubt, occupied by an 18lbr and the Rajah of Ranjipur, the Sikh commander, gaily mounted on his elephant.
A closer, though slightly out of focus, picture of the Rajah. The two Indian battalions clambered over the revetments, drove away the gunners, and occupied the redoubt.
On the left flank, two Indian battalions assault the far right Sikh redoubt but were flung back in disarray since it was garrisoned by two guns and a battalion of infantry. Here is where knowing we could roll saving throws for melee casualties might have helped the Indians. Oh well, such are the fortunes of war.
The fighting continues in the center over the redoubt in the background and for the ridge to its right (the viewers left). The white rings denote casualties in units which weren't removed until the entire unit broke and fled.
Meanwhile Mark was not lazing around. His infantry and cavalry were in close combat with Jay's left flank commands, including this stalwart line of irregular Sikh infantry.
Finally, as darkness began to fall, the Anglo-Indians had only taken the center redoubt while the Sikhs had kept control of both flanking redoubts. Both sides had been bled white. The Sikhs even took a British gun!
As I said earlier, there were points we missed in the rules, but we will be giving them another try later this summer.