Tuesday, September 23, 2014

Bamboo Huts

Back in 2004, the editor of Minitaure Wargaming dot Com created two 25/28mm size bamboo huts with burned out versions.  You can find the article here: http://www.miniaturewargaming.com/index.php/mwg/comments/bamboo_hut_paper_models/ which includes a download link for the pdf files.

I had downloaded the files but had not done anything with them for a long time.  Then Lori Brom announced the theme for Colonial Barracks 2014 as "And Two Battalions of Marines."  So I thought, dust off my Between the Wars "China" Marines and see what sort of scenario I can devise.  I decided on a rescue mission as the Marines go in to help some missionaries fleeing from a notoriously unstable warlord.  For that scenario I needed a trading station along a river as the end point in the rescue.  Ah ha! I'll use those bamboo hut models.  Crank up the printer and pull out the glue, let's get building, boys!

The two bamboo huts were quickly printed and construction began.  I used artist's matte board sandwiched between the outer and inner walls to stiffen them.  The walls, floor, and roof were all printed on 110-lb card stock.  The outer floor supports were made from Q-tip sticks (cotton buds for my European readers).  The smaller hut (3" x 3" roughly) would be the traders' living quarters and the larger (3" x 4" roughly) would be the trading post itself.

The smaller hut with the walls all glued together.  I made two sets of walls and glued one inside the other to have a passable interior.  The white box underneath is part of the foundation and will be painted to disguise it.  The two figures are 28mm Foundry Darkest Africa explorers mounted on washers that have been glued to 1" square 3mm bases.

The foundation has been painted and the outer floor supports are installed.

Glued to a masonite (hardboard) base and some added scatter for grass.

The larger hut is not quite as far along as I ran out of time before my game to test the scenario last Saturday.  It has a stair added and will get an overhanging front roof section to provide cover for the trade goods.

The trading post along the river with a docked steamboat and a beached amphibious plane.  The smaller hut is to the left and the larger to the right.  The steamboat is one I made from plans in an old Foundry article.  The amphibious plane is a actual 1936 Keystone Loening amphibious plane that was issued as a coin bank.

Here's another view of the smaller hut with the Keystone plane (and an unusual visitor!).  The plane is very useable for all sorts of Between the Wars and Pulp settings.
I made the roofs on both buildings removable so figures can be put inside.  At some time I think I'll make corrugated metal roofs for both so I can vary their appearance.  These were easy to construct and look very realistic.  More later as I get the trading post building finished and the bases with better scenics.

Saturday, September 13, 2014

15mm ACW Trial Painting

A short while ago I received my copy of the "On to Richmond" rules which Mark Severin of Scale Creep Miniatures and Flagship Games released.  After reading through it several times, it reinvigorated my long held desire to have ACW troops.  I originally had blue and gray armies using the old Airfix plastic figures but I sold them to a father who wanted to game ACW with his son.  My good wargaming buddy, Jay, already had a huge 25mm regimental-size army.  And my wargaming buddy Larry had a large 15mm regimental-size army.  So my option if I used OTR was to go with its recommended basing and organization using 15mm figures.  I requested some samples from Old Glory 15s to see if my old eyes could still paint 15mm figures.  OG15s sent eight foot figures, one mounted figure, and one gun.  And I found that I could still paint 15mm, or paint them at least well enough to look good in massed units.


I decided I wanted to see how a brigade "command" stand would look with a mounted officer on it as well as a flag bearer and some troops.  Now before you purists start having apoplexy, yes, there are both Union and Confederate figures on both bases, but remember, I was trying out my painting of 15mms not trying to build an army.  Anyway, I think substituting a mounted figure for two of the infantrymen and adding a flag will make the command base stand out.  The flag by the way is a hand-painted Van Dorn style flag used by some of the Confederate units in the Western Theater.  The gun will also look good with a full 4-figure crew, which is how OG15s bags them - 6 guns and 24 gunners.  By the way, the bases are just matte board cut to 2"x2" for the artillery and 2"x1" for the infantry.  The actual bases will probably be Litko pre-cut ones.

So all-in-all I'm satisfied with the figures, both from an ease of painting perspective and from a basing perspective.  Now all I've got to do is come up with the cash to raise the two armies - Thomas' XIV Corps of the Army of the Cumberland and Hardee's Corps (modified) of the Army of Tennessee - for starters.  This way I get 'Pap' Thomas and a brigade of regulars (by God!) on one side and Hardee, Cleburne, and the Orphan Brigade on the other, as well as modifying Hardee's Corps to add Hebert's Brigade which included my great-grandpappy's regiment, the 36th Mississippi Volunteers.

More later as this project (oh no, not another one!) progresses.


Battle of Jonesborough - Aug 31/Sep 1, 1864/2014

EDIT:  See update in Comments at end of post.

On Monday, Sep 1, 2014 (Labor Day here in the US), several of us gathered to test the newly released reprint (and update) of "On to Richmond" rules for the American Civil War.

These rules were originally published in the now defunct "The Courier" magazine and as a separate rule booklet.  They use the infantry or cavalry brigade as the basic maneuver element supported by artillery battalions of 12 guns.  Each stand is either 300 infantry or 200 cavalry and the brigades are made up of between 3 to 8 stands.

I decided since it was the 150th anniversary of the first day (Aug 31) of the battle of Jonesborough, Georgia, the culmination of the Atlanta campaign, to use it as the test run.  In the battle, two Confederate corps, Hardee's and S.D. Lee's, both under Lt Gen Hardee's command, attacked the Army of the Tennessee under Maj Gen O.O. Howard.  There were two Union corps in the first line and a third in reserve.  Each of the five players commanded a corps of two to three divisions.

It took us a while for me to go through the rules since we had never played them before.  The Confederates set up as they had done historically with Hardee's Corps (under Cleburne) on the left and Lee's Corps on the right.  But when they saw the Union deployment in hasty defensive works they tried to alter their attack by moving the their left.  That took up a goodly period of physical time so we only got to play two or three turns.  By then it was apparent that the Confederates weren't going to push the Union forces back so everyone agreed that it was a draw.  Historically on August 31, the Confederates launched vigorous attacks against the Union forces and suffered severe casualties without dislodging the Union from their positions to any great degree.  Then overnight, Gen Hood got worried about the safety of Atlanta and recalled Lee's Corps, leaving Hardee alone on Sep 1 to face both the Army of the Tennessee and the Army of the Cumberland.  Hardee resisted for a while but was forced to withdraw from Jonesborough, allowing the Union to completely cut the last rail line into Atlanta.  Gen Hood withdrew the Army of Tennessee on Sep 2 and the Union forces then marched into Atlanta.

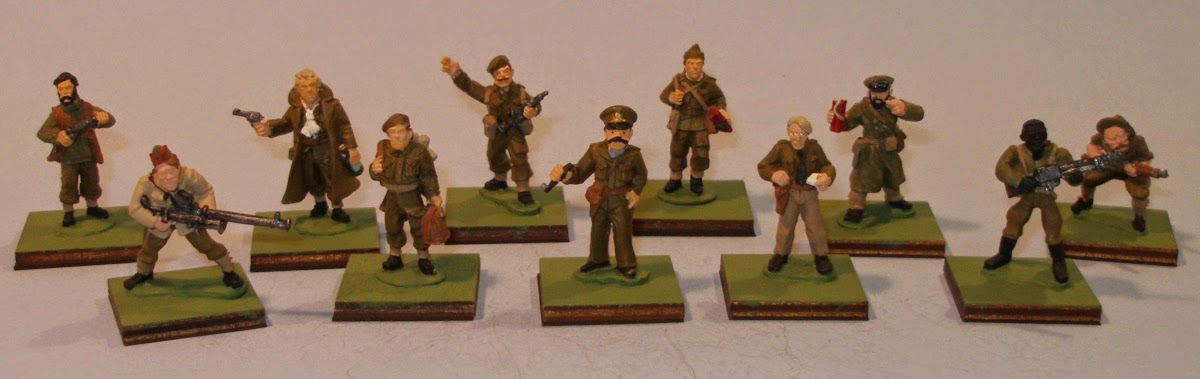
I only took a few pictures as I was trying to help several of the players understand the play sequence and the maneuvering of their commands.  We used my friend Jay's vintage 25mm ACW forces which are organized with regiments as the basic maneuver unit.  They got "promoted" to brigades for this battle.  The Union had 6 stands per infantry brigade while the understrength Confederate brigades only had 4 stands.  Even so, the forces were about equal since several Union divisions of the Army of the Tennessee were elsewhere that day.

The battlefield of Jonesborough, which is off the table to the east (left).  The Confederates set up along the left side of the table and the Union behind the hasty works at the foot of the ridge and then south (background) along the woods edge.

Looking north behind the Union behind Maj Gen Logan's XV Corps.  There seems to be a visitor to the battlefield.  I wonder if he had anything to do with the Union victory?

Looking south at the Union defenses.  A division of Logan's XV Corps is trying to get out of the woods to advance behind the shifting Confederates and cut the Macon and Western Railroad (off the table to the left).   [Evidently the Union side was sponsored by Coca Cola, as I forgot to ask the guys to remove the cans before I took the picture.]

The Confederate army attempted to shift to its left but continued to have traffic control problems.  Each division moved on its own card so a division in front of another might not have its card drawn before the one behind did, thus jamming up the movement.  In "On to Richmond" each division's brigades move and/or shoot when the division's card is drawn.  That took a while for the players to catch onto as we normally play rules where all movement is done first before any firing.

Brig Gen Kilpatrick's cavalry division supported the Army of the Tennessee.  They were dismounted behind fences along the edge of the woods.  Their devastating fire from Spencer repeating rifles was a surprise to the attacking Confederates.  Kilpatrick's boys could fire three times if they didn't move whereas normal rifled musket armed troops could only fire once.  [Even more obvious, and unintentional, product placement.]

The reserve XVII Corps under Maj Gen Blair begins to arrive and cross the Flint River.  Because the Confederates had moved south away from this northern end of the Union line, XVII Corps didn't get into contact.  But if the game had gone longer, they would have moved off the table to the east, captured Jonesborough, and cut the railroad line.

COMMENTS:   Now, what did we think of the rules.  Personally I liked them, even though I didn't actually move any troops.  The other players indicated that they would like to try them again, but I think there will be some changes made (i.e., "home" rules).  One thing we didn't like was having to roll a die to see if one could enter or pass through disruptive terrain.  Sean (playing Logan) had one of his brigades trapped in the woods even though the other brigade of that division was able to get out and advance.  He also tried to roll to remove some disruptions from one of his brigades that was in the hasty defenses.  Unfortunately he rolled too high and they charged out and across a field to get at the artillery that had been firing on them.  [EDIT:  I missed the statement on the morale table that units in works, etc. can ignore advance results.]  I think we'll make to modifications to those procedures to allow units a little easier time getting out of some woods (but some may be just be too heavy for them to easily traverse) and to make it harder for a unit to have to come out of defensive works.  But we have never seen a rule set that we didn't think would be better with our own improvements!

Friday, September 5, 2014

The Buddha Head - Part 1

My wife (bless her!) goes out walking with her friend from across the street (another veteran's wife).  They ramble throughout the neighborhood and occasionally make forays around the local area.  They pick up aluminum cans so her friend can sell them to The Can Man for a little pocket change.  They also look into the various trash dumpsters (dust bins to my British readers) along the way.  Over time they have come home with good clothes, some still with store tags, that have been thrown away, toys, and other stuff.  Most of it is cleaned and goes to a local non-profit's thrift store.

But the other day, she found this very nice, undamaged porcelain head.  I took one look at it and thought, "Its a long forgotten head of the Buddha!  I can use this in a pulp game."  And so work begins on "The Head of the Buddha."

The head hasn't been touched other than to be washed and then glued to a foam base.  Posing with him are a doughty explorer and his Ghurkha batman.

He'll get some weathering and a drapery of vines and other vegetation.  Soon he'll be the "beau of the jungle" just waiting for a doughty explorer to find him.

EDIT:  Thanks to Bluebear Jeff for correctly identifying the Buddha head.  I thought it was one but wasn't quite sure.

Very British Civil War Mercenary Band

The other day, Very British Civil War Forum member Panzerkaput brought up a topic about the use of mercenaries during the VBCW.  There was some discussion about their use, which you can read at the afore mentioned link.  I realized that I had never posted a picture of the small mercenary band I had created for my VBCW gaming.

These bravos have been hired by the Bishop of Cambridge to augment his forces against the Royalists and British Union of Fascists operating out of Colchester in eastern Essex against his allies in southwestern Suffolk.  Six of the figures are Artizan Design's Cadd's Commandos (pack PLP552 and pack PKP566) that I purchased from Brigade Games and the other five are Pulp Figures' General Cappy Boyd and his Expatriate Mercenaries.

So without further ado, here they are:


The band includes the commander (center) with his batman carrying his briefcase and golf clubs, an  executive officer, a sergeant with a submachinegun, two dynamite experts, a Boys antitank rifle gunner, a Browning automatic rifleman, another submachinegunner, a rifleman, and a "grounded" pilot (carrying the reason for his grounding - a bottle of MacCleave's Best Whiskey).  I'll probably add some additional figures as I come across them.