Monday, July 28, 2014

Pulp Figures Film Crew

Over the weekend I finally completed painting and basing my 28mm Pulp Figures film crew.  Bob Murch did a great job with the sculpting.  I just hope my paint job does them justice.

Posed in front of my British Union of Fascists propaganda truck, we have (from left) the script girl, director, camera man, and clapper.
I haven't assigned names to them yet so I'm open to suggestions. 

I plan on using them for various games in the Interwar period such as Pulp actions, Back of Beyond, and Very British Civil War.

Wednesday, July 23, 2014

VBCW Soldiers, Civilians, and Scenic Effects

On Monday I received a small order from Recreational Conflicts, a US manufacturer and distributor, of some civilians and scenic effects.  I thought that the unpainted pictures might be interesting.  As usual, please click on the images to get a larger picture.

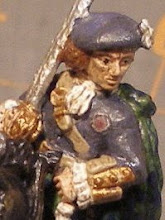
The six civilians I received are made by Ainsty and Lead Bones, the manufacturing arm of Recreational Conflicts.  First the two Ainsty castings, from the AGGRO line, are pack #AGG104, St. Johns Ambulance or Traffic Wardens.  I'm going to use them as a crew for my Rolls Royce ambulance that I've had for a while.  Although the female figure is in pants, that doesn't bother me as I suspect she would be a "rough and tumble" sort of woman to join the Royalist ambulance corps.


The four Lead Bones castings are next.  They are a set of four clerks although I will only use two (right pair) as shop keepers.  The other two will become a town leader (left center) in his smoking jacket (maybe the mayor) and a nurse (far left) at the local clinic.


The scenic effects are two of Ainsty's trade goods packets.  The first consists of five boxes of rifles, three with separate tops and two closed.  They'll be used as objective markers in future games.  Our friends Maude and Charlotta give some sense of scale to these boxes.


The other packet consists of four piles of mixed trade goods with Maude and Charlotta giving a sense of scale.  Again, these will become objective markers in future games.  Ainsty has many other sets of trade goods, almost all of which would fit into a VBCW game, as well as Colonial and Pulp games.


I'm excited about these and look forward to getting them painted and available for use.

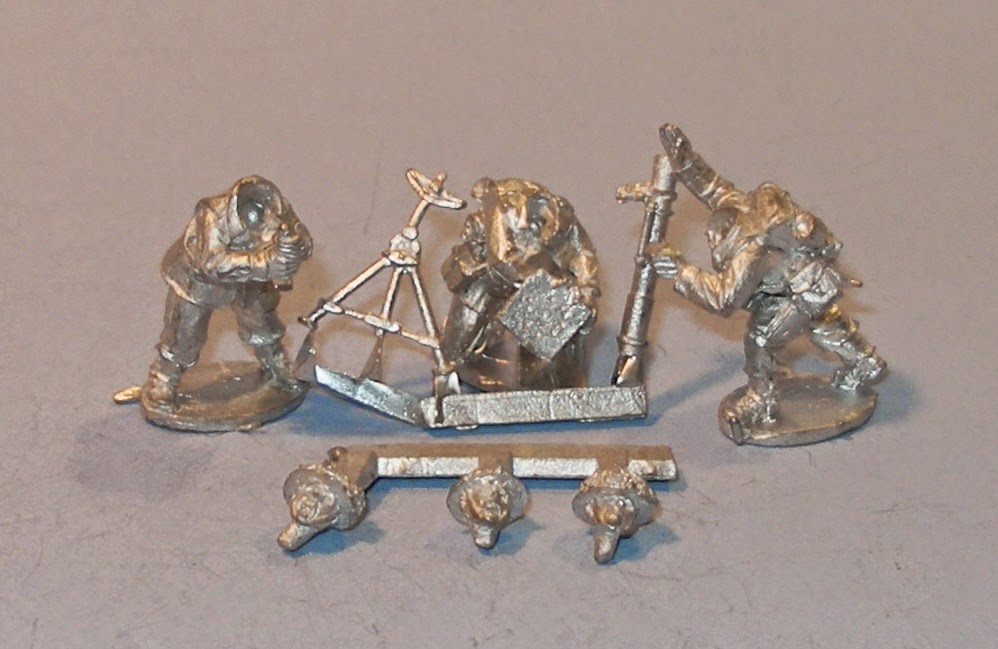
Last month at our regional Bayou Wars convention, I was able to buy two packs of WW2 British soldiers from my friend Rudy of Time Portal Hobbies.  The first is a three man 3-inch mortar squad from Warlord Games.  They come with separate heads.  The mortar has a tube, support legs, and baseplate while the crew consists of a gunner (right), loader (left), and shell preparer (center).  This mortar team will tend to offset the naval gun that the Harwich Maritime Defence Force has on the Anglican League side.


And the second is a two man sniper team from Great Escape Games.  Although my set has a kneeling spotter rather than the standing one illustrated, I think the kneeling spotter/escort figure looks better.  Now they can both hide amongst the bushes to pot the Anglican leaders.


Both of these packs will join my Royalist 2nd Battalion Essex Regiment.

More later as I get these painted.

Monday, July 21, 2014

Residential Houses - Finished

This past weekend I finally completed the two residential houses that I have been working upon for a couple of weeks.  From previous posts you will recall that these are paper mache "box" houses that I bought on sale at a local Michael's craft store.  Clad with paper brickwork adorned with doors and windows and paper roofing shingles, they are mounted on a 5mm foam core base.

Brick paving was added to the back in the form of a small patio and a walk to the back gate.

Here are the backyard walls with Missus Maude and Charlotta looking at the improvements.

On the fronts, I added iron rail fencing made from plastic sewing mesh that was suitably cut and trimmed and a cobblestone sidewalk.

The rears with all the brick paving in place, plus the walls and the rear cobblestone pathway intersected by the brick alley.

The front fencing has now been painted a gloss black and looks more like the wrought iron it is meant to be.

Grass has been planted in the small front yards and down the sides ...

and in the back yards.  The back yard walls have finally be glued into place.  The two houses are not glued into place but are held fairly securely by the front and rear stoops and the front fences and rear walls.

The final product in a sunny setting atop an old tree stump in my back yard.

And the rear view.
 In addition to finishing the two residential houses, the East Bergholt town hall was secured to its base, also 5mm foam core.

The borders were covered with cobblestone sidewalks.  The town hall still needs its sign over the front door.  The back door may become the town constabulary entrance if I can't find a suitable building for them.


More anon as I still have a fourth "Michael's" building to clad, many more paper buildings to cut out and construct, and some more "wilder" hedges to make, probably using this technique that was posted on The Miniatures Page:  DIY Bocage Hedges .


Friday, July 11, 2014

Residential Street in East Bergholt

I've taken two of my paper mache buildings (see previous post) that are clad in the same type of brick and used them to create a small residential street in my VBCW town of East Bergholt.  They will be mounted on a piece of 5mm foamcore that will front on one of the cobblestone streets of the town.

This shows the front of the lot with the cobblestone sidewalk and short brick paths leading to the front doors.  There will be an iron fence made from plastic sewing mesh along the front and a narrow yard between it and the buildings.  I'll lay a brick alleyway down between the buildings.

Here is the rear view showing the beginning of the brick wall enclosed back yards.  These yards will have brick wall across the rear with a gate.  Inside each yard will be a small brick patio and either a small garden or a landscaped tree, depending on how much room I have inside the walls.

The brick walls and pillars are downloads from Dave Graffam Models paper building web site:  http://www.davesgames.net/catalog-low-walls.htm .  The wall printouts are wrapped around 5mm foamcore and the pillars around balsa wood to provide some stiffening to the paper.  I've used his paper buildings and walls on other VBCW projects and have been satisfied by the relative ease of assembly and the value, especially when you can print as many copies as you need and change the "skin" of the model.  These walls can be printed in red or gray brick or in gray or brown stone and in lengths from 1" up to 6" in 1/2" increments.

More later.

Monday, July 7, 2014

Progress on Paper Mache Houses from Michaels

Back in January 2014, I was lucky to find four large paper mache houses on sale at one of our local Michael's craft stores.  Michaels Houses   Some time after that I discovered a web site with a wealth of building and scenery photographs.  CGTextures   You have to sign up to use the site but it doesn't cost anything.  Check it out and I'm sure you will find many useful images.  Even with the most basic imaging software (paint.net), I was able to add various windows and doors and maneuver bits and pieces around to make the appropriately sized skins.

From that site I was able to construct "skins" for the houses.  A month or so ago I finally started applying the "skins."  This is a report of the progress as of about a week ago.


Here is the roof section of one of the houses with the brick wall skin around the base and the roofing shingle skin being applied.  It was a challenge to work the shingling around the dormer but I had printed enough sections so I could piece it together.  Although I used glue sticks (background) for the main building wall sections, I used white glue for the shingling and the chimney skin.  It seemed to work just as well as the glue sticks.


Here is one of the houses almost completely clad in its "skin."  At the time I took this picture I still had to print some more corner moulding for the upper section.  That has been done and it looks much better.  This building will eventually be my town hall for East Bergholt.  The figure is a 28mm Battle Honours early WW1 British officer who is being used as the lieutenant colonel commanding the Anglican coalition forces in south-west Suffolk in my Very British Civil War universe.


And here is a second building (on left) being clad in its skin.  I cut and moved the wall pieces higher towards the divide between the lower building part and the roof part which, I think, makes the buildings look better.  The piece I trimmed off the top was then glued along the bottom.  This second building and a third similarly clad are being mounted on a piece of foam-core to serve as a small set of apartment buildings for my town.  They will have walled back yards with a brick patio and some flower beds.

The second and third buildings now have their complete "skins" applied.  I still have a fourth one to do which will hopefully happen later this week.  Another progress report will be forthcoming.

Cheers!