


Rules used: The Sword and the Flame (20th Anniversary edition) by Larry Brom
Figures used were, with a few execptions, the venerable Ral Partha colonial figures, all owned and painted by Jim Pitts.
 An overview of the battlefield, with Phil Young (l), Jay Stribling (c), and Bill Hamilton (r) moving and deploying troops. Not shown are Sean Pitts and Ed Sansing.
 A closer look at part of the battlefield showing the left part of the Highlander battle line, the village of Khalaam (occupied by Indian troops), and the watchtower hill and the Anglo-Indian cavalry in the background.
 The Fort of Khalaam, garrisoned by a unit of 20 rifle-armed Haddabiera tribesmen and the Emir and his banner bearer.
 The Highland battle line with the Royal Artillery battery behind its protective wall of gabions. From this position, the guns began firing on the fort in an attempt to breech the walls.
 Meanwhile, in the village of Khalaam, the action is being recorded for posterity by Nigel Bettafloss, star reporter from the London Times, and his cameraman.
 Dismounted British hussars skirmish with Haddabiera riflemen on the slopes of watchtower hill. The hussars are supported by the Indian mountain battery on the left and a platoon of Ghurkhas and a troop of Bengal lancers to the right and rear.
 Toward the end of the battle, the Haddabiera cavalry launches several last ditch charges. In the foreground, a band of Haddabiera attempt to close with an Indian platoon in square. The Haddabiera closed, but not before they took several casualties from Indian rifle fire. In the ensuing melee, the Indians easily drove the Haddabiera away, inflicting severe casualties.
In the background, the other Haddabiera cavalry band can be seen. Their action is portrayed in the next two pictures.
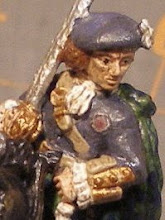
 Here the second Haddabiera mounted band (being played by a band of Dervish warriors), urged on by the cavalry commander (in blue with banner), attack the Indian mountain battery.
OOOPS!
Close-in shrapnel fire killed 10 of the 12 mounted warriors, but the remaining two (the band's leader and a warrior) closed with the battery. The British field force commander and his two escorts joined in the defense of the battery.
 The action was furious as the two mounted Haddabiera either killed or chased away the Indian gunners and the battery officer. Then the commander's escort engaged. The Haddabiera warrior was forced back and then one escort was killed and the other forced back by the band leader. Suddenly it was mano-a-mano between the British commander and the Haddabiera mounted band leader. But the British commander's Webley didn't fail him and he killed the Haddabiera leader, saving the situation here in the center.
 At the end we staged an assault on the fort to gain some data about the best way to interpret Larry's rules. Here a Highland platoon begins to cross the breeched wall, defended by a few Haddabiera warriors and the Emir and his banner bearer.
 The Highlanders assault the breech in this staged test. They could only fit three figures into the breech and two separate attempts were bloodily repulses. After some discussion and a re-reading of the rules (always a good thing), we realized some more testing would be needed. Sean and I will do that at home over the next three weeks to refine the procedures.
I gained a lot of good information and suggestions from this play test which I will incorporate into the final test.
4 comments:
What an exciting scenario! The fort looked great as well. Nothing like single combat to settle an issue. Well done...
Looks like it'll be a fun game!
The correspondent and cameraman are a nice touch. :-)
(must resist the urge to get side-tracked into a new project... but one of these days...)
One of the things that I think is necessary in a "convention game" is some fluidity.
The final decision (one way or the other) SHOULD come with fighting at the breach.
If the attackers just sit and shoot all day, nothing very exciting happens . . . you might want to limit artillery ammunition by having an explosion or bad powder or some such device to force closing on the fort once a breach has been created. Getting to the hand-to-hand fighting is the key to everyone feeling like it was a good game.
It looks terrific by the way. A good report.
-- Jeff
Jeff,
Thanks for your suggestion. That is also what I want to happen. My son and I will be going some additional play testing during June.
Jim
Post a Comment