Tuesday, October 20, 2009

The Affair at Eisenmuhlen - Part 3

As the cavalry was battling to and fro off on the flank and Phil's Imperium brigade was tangling with the Brittanians in and around the woods, the rest of the Imperium army continued their advance against the Electoral defenses around the cannon foundry.

As usual, please click on the pictures to see a larger image.


Photo by Bill Hamilton
John Murdaugh's brigade of Imperium and Reichsarmee battalions advances towards the Eisenmuhlen Regiment defending their cannon foundry.


Photo by Bill Hamilton
Across the road to their right, Mark Stevens' Courland and Sachsen-Wachsenstein grenadiers advance forced the Carpanian jagers to give up the outlying farm after a token resistance. After all, if you were a jager would you want to tangle with grenadiers?


Photo by Jim Pitts
And to the left of John's brigade, Clay James continued to advance his brigade of Courland and Sachsen-Wachsenstein infantry on the Imperium's left flank.


Photo by Ed Sansing
The might of the Imperium army gets closer to the Electoral defenses.


Photo by Ed Sansing
Meanwhile, Larry Reeves, on the Electoral right, adjusts his Carpanian defenders while the Britannian light dragoons and Carpanian jagers regroup behind him.


Photo by Ed Sansing
And the cavalry melee continues into a second round while the Imperium infantry gets ready to attack the Brittanians in the woods.


Photo by Jim Pitts
While all this was happening, Mark Stevens consolidated his army's heavy artillery on a small hill to begin bombarding the Electoral defenders around the cannon foundry. A Courland 12-lbr is in the foreground, with a Courland 20-lb licorne in the center and a Sachsen-Wachsenstein 8-lbr on the other end of the gun line.


Photo by Ed Sansing
Mark's Courland grenadiers get ready to cross the hedge around the farm yard.


Photo by Ed Sansing
The Electoral defenders await the initial onslaught of the Imperium forces. In the foreground are some of the newly cast guns from the foundry, while to their rear a company of Carpanian jagers regroups after the light troops battle earlier in the game.


Photo by Ed Sansing
The Courland Constantine Horse (left) is getting the worst of its melee with a squadron of the Carpanian Hapnich Dragoons. It will soon fall back, followed by the Carpanians. In the background, the Reichsarmee troops have inflicted some losses on the Brittanians defending the woods.


Photo by Bill Hamilton
The Reichsarmee and Courland/Sachsen briagdes haven't made much progress in their attack. Could the Electoral defenses look too formidable?


Photo by Ed Sansing
But finally Clay's Courland and Sachsen-Wachsenstein battalions begin to put pressure on Larry's Carpanians, forcing some of them back across the stream. Ed Sansing has moved a company of Carpanian jagers to screen the far right flank of Larry's line.


Photo by Bill Hamilton
As John Murdaugh's Reichsarmee battalions begin their assault in the background, the rest of the Electoral line still awaits the Courland grenadiers. But they seem to be moving very slowly.


Photo by Ed Sansing
And here's the reason - they have been taking casualties from the Electoral artillery and appear not to want to give up the scant protection of the farm yard hedges.
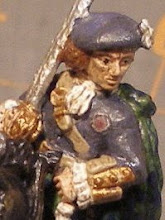

Photo by Ed Sansing
At the end of the battle, Mark Stevens, the Imperium commander, takes a close-up look at the Carpanians of Larry Reeves brigade. In this picture you can also see how close some of John Murdaugh's Reichsarmee battalions got, and the casualties they took doing so.


The battle was deemed a draw by the umpire (yours truly). Although the Imperium had failed to take the cannon foundry, they were in good positions to outflank it.

This was the second actual battle we had using Bill Protz's Batailles de l'Ancien Regime rules. I'm sure there are some things we didn't do quite correctly, but it appeared that everyone had a good time and seemed to master some of the intracacies of 18th Century battle field maneuvering.

Lessons Learned: First of all, I would not have a light troops battle before the main affair. It took up too much time and didn't really affect the battle. Secondly, as in the first battle, I should have already had the armies set up and allowed only a small amount of adjustment before the start. Thirdly, the Carpanians had too many guns and their defenses were very strong. The Imperium troops would have been hard pressed to actually break into the cannon foundry grounds if the battle had gotten that far.

Although we won't have any more battles this campaigning season, you can look forward to some more in 1760/2010.

Monday, October 19, 2009

Affair at Eisenmuhlen - Part 2

As the light troops began to fall back, the "big boys" of the Imperium's main battle line approach the field of battle.

Please click on the pictures from a larger image.


Photo by Ed Sansing
Mark Stevens, the Imperium commander, watches as the light troops battle winds down and his two center brigades begin to appear on the battlefield.


Photo by Ed Sansing
On the Imperium left flank, Clay James' brigade of Sachsen-Wachsenstein (near) and Courland (far) battalions march on in perfect order, flags flying and drums beating!


Photo by Jim Pitts
In the Imperium center, Mark Stevens brigade of Courland and Sachsen-Wachsenstein grenadiers (on the left) and John Murdaugh's brigade of Imperium and Reichs Armee battalions (on the right) advance astride the road from Alt Kirchendorf to Eisenmuhlen. A few Pandurs are still in front and the light cavalry melee is drawing to a close on the far right.


Photo by Jim Pitts
And on the Imperium right flank, Phil Young's brigade of Reichs Armee battalions and two squadrons of Courland cavalry march on in good order.

Photo by Bill Hamilton
Another picture of Phil's brigade, this time as seen from the Carpanian defender's perspective.


Photo by Bill Hamilton
A company of Carpanian jagers hides behind a small woods as the Courland Timofievich Cossacks ride by on the far side. The jagers battle was over and they did want to tangle with those madmen and their lances!


Photo by Ed Sansing
The Carpanian and Brittanian light troops continue their withdrawal behind the main battle lines while the Imperium forces begin to advance onto the main table.


Photo by Bill Hamilton
Clay James observes the Carpanian light troops withdrawing behind their battle line as his brigade continues its advance. Just beyond the roofs of the cannon foundry stands the red-coated Fusiliers of Bremen, a battalion hired by Brittanian gold to assist the Electoral cause.


Photo by Jim Pitts
The Carpanian right, commanded by Larry Reeves, and center, commanded by Bill Hamilton, man their defensive works as the Imperium troops continue their slow approach.
[NOTE: The Martian walker is NOT part of the Carpanian army!]


Photo by Bill Hamilton
Phil's Imperium brigade and cavalry continue to advance. So far as they can tell, there are no defenders to their front. Can this be true? Do they have an unimpeded route into the electoral left rear?


Photo by Jim Pitts
Larry Reeves keeps a hawk eye watch on the Imperium forces as they advance toward his defenders. In the foreground, the Carpanian defenders of the cannon foundry are ready to repel any Imperium assaults. They have pulled the four newly cast guns into the line and spread their available gunners out to man them, assisted by some drafted infantry.


Photo by Ed Sansing
A view from the perspective of the Carpanian defenders. A company of jagers temporarily mans an outwork around a small farm while the Courland and Sachsen-Wachsenstein grenadiers approach them.


Photo by Ed Sansing
A good picture looking down the Carpanian defensive line with Campbell's Highland Battalion in the foreground, anchoring the left of the defensive line.


Photo by Jim Pitts
An overview of the main battle field with the Imperium attackers on the right and the Electoral defenders on the left.


Photo by Ed Sansing
Phil's Imperium brigade continues its unimpeded advance on the right flank. Is there really nothing ahead of them?


Photo by Ed Sansing
Well, not exactly. As the Courland cavalry advances around the tip of the woods, they suddenly espy the two squadrons of the Hapnich Dragoons, who immediately begin to trot towards them.


Photo by Jim Pitts
With a clash of sabers, the two evenly matched cavalry forces meet!


Photo by Bill Hamilton
Men shout! Horses scream! Sabers ring against each other!


Photo by Jim Pitts
And while the cavalry engage in the background, Phil's Imperium infantry get just close enough to the woods to observe that they are filled with the red coats of a brigade of Brittanian infantry.
Where did they come from?!? They were reported by spies to have marched off to rejoin their comrades northeast of Minden with the main Brittanian army!
Just goes to show that you can't believe everything a spy tells you. He may be working for the other side.
[Note: The game master learned this deviousness from his long time gaming partner, Jay "Lord Sterling" Stribling.]


Photo by Bill Hamilton
As the Imperium troops begin to react to the surprise appearance of the Brittanians, the Fusiliers of Emden (another Brittanian hire) on the far left of the Electoral line breath a sigh of relief. They really weren't looking forward to having to deal with four Imperium battalions, even if they were all Reichs Armee units.

Stay tuned for Part 3 of the battle report as we resolve the action and conclude the battle.

Tuesday, October 13, 2009

Affair at Eisenmuhlen - Part 1

[Beginning Note: I've been very slow in getting this report posted. But, better late than never!]

[Additional Note: Although Blogger says this was posted on Oct. 13, it actually wasn't finished and posted until Oct. 19.]

After their victory on 19 September 1759/2009, the Imperial Reichsarmeeabteilung Obere Sachsen reorganized its forces and added enough replacements to bring its units back to full strength. They then marched north, following the withdrawing Electoral army, towards the Barony of Eisenmuhlen and its important cannon foundry.

The Electorische Armee Thuringen fell back in front of the Imperials. But as they were drawing closer to their depots, they were also able to gain replacements to bring almost all their units back to full strength. Approaching the cannon foundry at Eisenmuhlen, the commander received orders from the Markgraf to defend this important point with all his might. He quickly set his army to building hasty fortifications using gabions and wood from some of the non-essential buildings in the area.

The game was played on 3 October 1759/2009 in the Fellowship Hall of Fondren Presbyterian Church on one main table (16' x 5.5') and two back tables (16' x 2.5' each). The Electoral army would set up on the main table with a light troops screen to their front along the "enemy" edge of the main table. The Imperial army would begin with only their light troops deployed 12" in from their side of their rear table and their main forces in columns advancing from "off the table."

The forces involved were almost the same from the last game, with both sides light troops not having a battalion gun this time and the Electoral side missing one battalion of Brittanians and a battalion gun (lost in the last action).

As usual, please click on the photos from larger versions.

Photo by Jim Pitts

The cannon foundry at Eisenmuhlen with four newly completed guns sitting in the yard.


Photo by Jim Pitts

The Denkmal (monument) hill where Reich Duke and Duchess von Beerstein, accompanied by the Duke and Duchess of Courland and the Duke and Duchess von Sachsen-Wachsenstein, observed the battle. If you look closely, you can espy "Frivolous" Fiona MacGillicuddy in the background with her bumbershoot and flask of single malt.


Photo by Jim Pitts

The Imperial commanders - Mark Stevens (army commander) and Clay James, standing, and Phil Young and John Murdaugh, seated.


Photo by Jim Pitts

The Electoral commanders - from left - Larry Reeves, Ed Sansing, Sean Pitts, and Bill Hamilton (army commander)


Photo by Ed Sansing

The main table battlefield with Eisenmuhlen in the center right.
The game master, Jim Pitts (Col Campbell, in khaki shorts) is briefing some of the players.

In order to simulate the "fog of war," we erected a screen down the main table with only the Electoral light troops visible to the approaching Imperials.


Photo by Ed Sansing

The Electoral light troops screen, commanded by Ed Sansing, with a company of Carpanian jagers on either flank, the Warsteiner Freikorps, and the light dragoons in the center.


Photo by Ed Sansing

The Electoral light troops screen from the opposite flank.


Photo by Bill Hamilton

And hidden behind the "fog of war" screen was the Electoral army in its defensive positions, here looking from the extreme right flank whose troops were commanded by Larry Reeves. The woods in the distance held a surprise for the Imperials.

The Imperials would not be able to see the Electoral deployment until one of their light troop units touched the screen, thus lifting the "fog of war."


Photo by Bill Hamilton

The Courland Tomifievich Cossacks were the first to penetrate the "fog of war" screen as they reconnoitered around the flank of the Electoral screen. And they saw the open right flank of the Electoral army.

But here the "fog of war" still reigned as they sat immobile for the next turn because their commander forgot to move them and was also not told about one of their victory conditions - get light units off the electoral side of the back table and raid towards the Carpanian capitol of Potzdorf. The Electoral right flank commander was able to redeploy his battalions to seal off the gap and discouraged the Cossacks from any further advances.


Photo by Jim Pitts

Meanwhile, the Carpanian light troops commander launched all his light cavalry in an attempt to clear the Imperial light troops away from screening their army's advance. Here a small squadron of York Dragoons attack and disperse a company of Courland Pandurs, eventually chasing them completely away and pursuing them off the battlefield.


Photo by Jim Pitts

A long range view of the fighting between the two sides' light troops along the gap between the main table and the Imperial back table.


Photo by Jim Pitts

Supported by the Warsteiner Freikorps, the Britannian Queen's Rangers light dragoons and the 17th Light Dragoons engage the converged Reichsarmee light dragoons.

And here we will leave the light troops battle. After defeating the Imperial light dragoons, the light troops on both sides pulled back as the Imperial army advanced onto the battlefield and the "fog of war" cleared to reveal the Electoral army in all its splendor.

Part 2 will cover the main battle.

Thursday, October 8, 2009

September 2009 Painting

Since I was preparing for two "big battalion" games this month (one on September 19 and the other on October 3), I didn't get much painting done - just 10 "Olley" points. But I did construct two rather large paper buildings, including a walled cemetery and graves for one.


This figure is a mounted officer from the (sadly) out-of-production Spanish range from the London Warroom. He is a very nice casting, waving his hat to encourage the troops, and sits very well on his horse. For my two games, he played a role as commander of one of the Reichsarmee brigades in the Imperium army.


During September, I painted 8 of the 24 figures in the unit of Hessian grenadiers. The other 16 have been painted for a number of years. The 8 new figures are all in the front rank and are Miniature Figurines SYW figures. The rest of the unit are Miniature Figurines (the advancing poses) and an unknown (to me) manufacturer (the march attack poses). This battalion is actually part of my American Revolution army but was drafted to play the role of a converged Reichsarmee grenadier battalion.

Later edit: According to DC, in his comment, the march attack figures are from Garrison Miniatures.


You've seen this church before as I posted an "under construction" entry earlier in September and it was featured in The Affair at Alt Kirchendorf, the first "big battalion" game I ran on Saturday, September 19 (see earlier posts for the 3-part battle report). Please see The Old Church posting for more details.


Here it is "in action" with its cemetery garrisoned by a company of Carpanian grenadiers.


The other paper building was the cannon foundry at Eisenmuhlen (which means iron mills in German). This building is actually in two parts which can be used together or separately. As was the church, the paper walls were glued to a foam core sub structure. The roof on the one-story part is removable. The cannon are a pair from RAFM.


And here is a shot of it on the battlefield of The Affair at Eisenmuhlen, which was the "big battalion" game I ran on Saturday, October 3. There will be more pictures of it in the battle report, which is still to be posted.

For October, I've already started on a third company for the Regiment Eisenmuhlen (RSM95 British infantry). I also will, finally, begin work on my 28mm French and Indian War figures and hopefully begin some work on the Regiment Royal Eccossais, using Old Glory figures.