


In 2001 and 2002, we played a five game quasi-campaign that started off with an Imperial advance up the Green Nile branch of the Nile River. This game posits that an Egyptian/Sudanese force was sent east towards the Red Sea to occupy a strategic oasis. They were almost immediately besieged by the Emir Tubeir and a motley force of Dervishes, Beja, Tuaregs, Arabs, and others (basically almost all of the painted native troops I have). An Anglo-Indian relief column under Leftenant Colonel Manly-Jones has been sent to relieve the garrison and destroy the Emir's forces.
The Egyptian/Sudanese garrison of the oasis had one Egyptian infantry platoon, one Sudanese platoon, one Egyptian gun, an infantry company commander and senior sergeant, and a senior Egyptian commander (who was killed almost as soon as the attacks started).
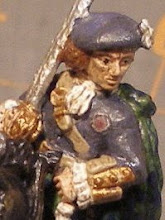
The Emir's forces had 12 infantry units, 4 horse units, 2 camel units, and 2 guns, organized into four individual commands and a reserve. Each command had a senior leader plus there was a figurer for the Emir.
The Imperial relief column had two Highland infantry platoons with a company commander and senior sergeant, two Punjabi (Indian) infantry platoons with a company commander and senior sergeant, a Bengal lancer cavalry troop, an Indian mountain battery with 3 guns, and a 2 gun Royal Navy Gatling gun detachment, plus a command figure (plus 2 man escort) for Lt Col Manly-Jones.
Now on to the action!
 |
|
The battlefield showing the oasis being besieged by the forces of
Emir Tubeir - Arabs, Tuaregs, Beja,
Dervishes, and others.
|
 |
|
A close-up of the Tuareg camelry. Although impressive they didn't do
much damage to the Imperials during the battle.
|
 |
|
A close-up of the Arab command's cavalry also showing where some of
the native force was hidden and the Imperial entry area.
|
 |
|
Initial advance of Indian command gets hit by previously hidden
Baluchi and Sudanese forces while the Arab cavalry watches for an
opportunity to charge.
|
 |
|
The Dervish command lines up to attack the Sudanese and Egyptian
defenders who were protected by a thorn zariba. The Dervish
commander on the far left was quickly picked off by a lucky Egyptian
shot (an Ace was drawn and he was in the fire cone.).
|
 |
|
The Arab command's infantry line up to attack the oasis. They are to
the right of the Dervish in the preceding picture. The one Egyptian
gun can barely be seen on the far right curve of the oasis.
|
 |
|
Initial Arab, Tuareg, and Dervish attacks on the oasis tried to
overwhelm the garrison before the Imperial relief column could reach
them. But the plucky Sudanese and Egyptians were able to hold them
off.
|
 |
|
Another picture of the Dervish and Arab attackers closing the zariba.
|
 |
|
A little further around to the left another Dervish unit closes the
zariba.
|
 |
|
The Indian command moves further forward but exposes its guns to
attacking Sudanese infantry while an Indian platoon beats off the
Baluchis with rifle fire. In the background the Arab cavalry and
Bengal lancers tangle while one of the Highlander platoons awaits to
pour fire into the Tuareg camelry.
|
 |
|
Another shot of the native force attacks on the Indians. The
Sudanese were able to kill most of the Indian gunners and capture two
guns, but later the Indian infantry forced them off with rifle fire
and recaptured the guns.
|
 |
|
Here is a picture of the victorious Sudanese capering around the
newly captured guns. The Bengal lancers and one of the Arab cavalry
units fight in the foreground but for some reason the other Arab
cavalry unit (green coats) never joined the melee.
|
 |
|
Another view of the cavalry battle showing the reserve Tuareg cavalry
and the location of the Royal Navy Gatling guns. While one gun
initially jammed, both were able to shoot up the Tuareg camelry and
cavalry.
|
 |
|
The two Dervish guns, captured Egyptian Krupp pieces. The left gun
was singularly mismanaged during the attack and kept trying to load
the shells backwards (through a 6 meaning they couldn't fire).
Eventually both were able to fire at the oasis but didn't do too much
damage.
|
 |
|
Dervish riflemen reveal themselves by firing at the Egyptian
defenders while the Dervish and Arab attacks continue.
|
 |
|
A final shot of the attack on the zariba. Finally one of the Dervish
units was able to fight its way inside. In the background are the
two Beja infantry units finally joining the assault.
|
So, how did the fight end? Well we judged that although the native
force infantry would have been able to take the oasis, the Imperial
relief column was just too strong to be defeated by what native
forces were left.
3 comments:
There's an impressive spectacle. Was this the final game of the campaign or were there others afterwards?
Conrad - The "campaign" occurred back in 2001 and 2002 and consisted of 5 battles. This was just a one-off as a convention game.
Jim
Col Campbell, the game sounds great! I still love those Ral Partha figs. If I make to Colonial Barracks again the year I'll be signing up for this game for sure.
Cheers,
JB
http://sgtguinness.blogspot.com
Post a Comment